Carrier Service and Functions
Free shipping for tagged customers.
Introduction
This tutorial is outdated, it is now possible to discount the shipping price using functions. Delivery methods can greatly vary among different stores. The Shopify user interface allows you to create unique shipping profiles based on the weight and price of the cart. However, sometimes you might have too many rules to apply.
The Carrier Service API provides an easy way to create a custom shipping method, albeit with some limitations.
Functions can be used to enhance the carrier service API, and we will see how.
The goal

Our customer hands us a csv like this
max_weight_kg,price,service
1,10,Carrier 1
1,15,Carrier 2
3,12,Carrier 1
4,18,Carrier 2
...
36,98,Carrier 1
100,150,Carrier 2
And then, adds in a hush, “Also, shipping should be free for customers tagged as ‘VIP’.”
Hence, our objective is to display the appropriate shipping prices based on the weight, and offer free delivery for all methods if the customer is tagged as ‘VIP’.
Carrier Service API
It seems the Carrier Service API is not very familiar to developers.
Implementing a carrier service does not require creating an app; you only need to establish a public endpoint that can receive a POST request from Shopify and return a JSON response.
The store must subscribe to the Advanced Shopify plan or higher to install a custom carrier service.
The input
Let’s define the input using Typescript
type CarrierServiceRequestBody = {
    rate: {
        origin: ShopifyAddress,
        destination: ShopifyAddress,
        items: [CartItem],
        currency: string,
        locale: string
    }
}
type ShopifyAddress = {
    country: string,
    postal_code: string,
    province: string,
    city: string,
    name: string,
    address1: string,
    address2: string,
    phone: null, // always null
    address3: null, // always null
    fax: null // always null,
    email: null, // always null
    address_type: null, // always null
    company_name: null // always null
}
type CartItem = {
    name: string,
    sku: string,
    quantity: number,
    grams: number,
    price: number,
    vendor: string
    requires_shipping: boolean,
    taxable: boolean,
    fulfillment_service: string,
    properties: any,
    product_id: number,
    variant_id: number,
}
The input is a JSON object that matches the CarrierServiceRequestBody type.
Some fields such as phone, address3, fax, email, address_type, and company_name will always be null.
Additionally, we don’t receive any information about the customer, so we can’t determine whether they are tagged
as VIP or not.
The output
The output is a JSON object of type CarrierServiceResponseBody
type CarrierServiceResponseBody = {
    rates: [
        {
            currency: string,
            description: string,
            service_code: string,
            service_name: string,
            weight_min_lb: number,
            weight_max_lb: number,
            total_price: number // in cents
        }
    ]
}
From the output, it’s clear that you can return multiple shipping methods, each with a unique price and weight range.
You don’t need to calculate the weight of the items; simply return all the applicable shipping methods with their corresponding weight ranges. Shopify will only display the methods that fall within the correct weight range.
You might want to calculate the cart’s total if you have a formula for determining the shipping based on prices as well.
Interestingly, the input weight is in grams while the output is in pounds, which I find quite amusing.

Implementation using Cloudflare Workers
Cloudflare Workers are an excellent choice for implementing a carrier service due to their cost-effectiveness and ease of deployment. There are several other methods to implement a REST API, such as AWS Lambda, Google Cloud Functions, Azure Functions, etc. However, I find Cloudflare Workers to be the most developer-friendly.
To start the project we need to download the Cloudflare Workers CLI.
Then, following the documentation we can create a new project
$ yarn create cloudflare
And when asked we will choose the option Hello World and TypeScript.
╭ Create an application with Cloudflare Step 1 of 3
│
├ In which directory do you want to create your application?
│ dir ./my-carrier-service
│
├ What type of application do you want to create?
│ type "Hello World" Worker
│
╰ Do you want to use TypeScript?
    Yes / No
This will create a new folder with a file src/index.ts containing a hello world example.
export interface Env {
}

export default {
    async fetch(request: Request, env: Env, ctx: ExecutionContext): Promise<Response> {
        return new Response('Hello World!');
    },
};
We have almost everything, we just need to create and retrieve the configuration.
Configuration on Cloudflare
To host the configuration, we’ll utilize Cloudflare KV. We’ll convert our CSV into a JSON object and store it in KV.
First, we need to create a KV namespace, after which we can upload the configuration.
$ wrangler kv:namespace create "SHIPPING_CONFIG"
🌀 Creating namespace with title "my-carrier-service-SHIPPING_CONFIG"
✨ Success!
Add the following to your configuration file in your kv_namespaces array:
{ binding = "SHIPPING_CONFIG", id = "6..............................4" }
In the folder previously created with a wrangler.toml file, we can add the namespace to the kv_namespaces array.
[[kv_namespaces]]
binding = "SHIPPING_CONFIGURATION"
id = "6..............................4"
We simply convert the .csv into a .json file (without altering the structure):
{
  "rates": [
    {
      "min_weight_kg": 0,
      "max_weight_kg": 1,
      "price": 10,
      "service": "Carrier 1"
    },
    {
      "min_weight_kg": 0,
      "max_weight_kg": 1,
      "price": 15,
      "service": "Carrier 2"
    },
    ...
  ]
}
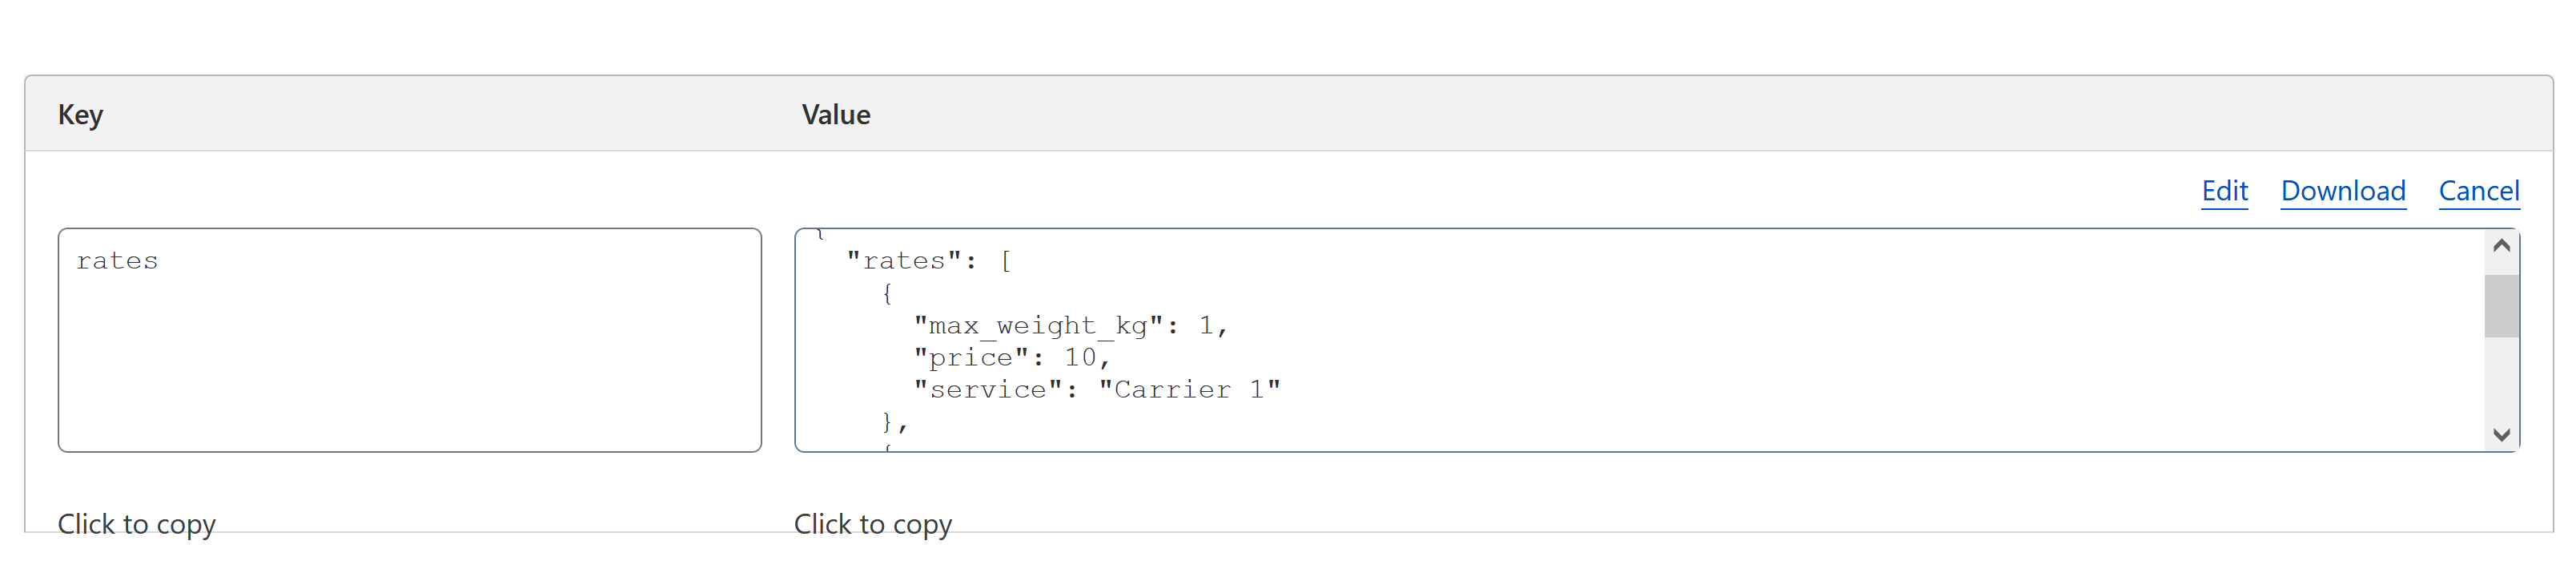
and we can upload it to KV.
$ wrangler kv:key put --binding-"SHIPPING_CONFIG" "shipping_config" "$(cat config.json)"
If you’re having difficulty with the command, you can use the Cloudflare dashboard to upload the correct value.
Implementation
Now we can implement the carrier service.
export interface Env {
    SHIPPING_CONFIGURATION: KVNamespace;
}

type RateConf = {
    'min_weight_kg': number,
    'max_weight_kg': number,
    'price': number,
    'service': string
}

type RatesConf = {
    'rates': RateConf[]
}

const DEFAULT_RATES: RatesConf = { // this is not needed, Shopify will provide a default delivery price in case of error or empty response
    'rates': [{
        'min_weight_kg': 0,
        'max_weight_kg': 1000,
        'price': 5,
        'service': 'Carrier 1'
    }, {
        'min_weight_kg': 0,
        'max_weight_kg': 1000,
        'price': 5,
        'service': 'Carrier 2'
    }
    ]
};

export default {
    async fetch(request: Request, env: Env, ctx: ExecutionContext): Promise<Response> {
        // const body : CarrierServiceRequestBody = await request.json(); we don't need this, but here we would have the Shopify request body
        const value: RatesConf = JSON.parse(await env.SHIPPING_CONFIGURATION.get('rates') || 'null') || DEFAULT_RATES;
        const rates = value.rates.map((rate) => {
            return {
                currency: 'EUR', // this could be put in configuration
                description: '', // if left empty is not shown
                service_code: rate.service,
                service_name: rate.service, // this is what is shown at checkout
                weight_min_lb: rate.min_weight_kg * 2.20462,
                weight_max_lb: rate.max_weight_kg * 2.20462,
                total_price: rate.price * 100 // this would be better to be saved in cents in the configuration
            };
        });

        return new Response(JSON.stringify({'rates': rates}));
    }
};
Deploy
To deploy the carrier service we need to run
$ wrangler deploy
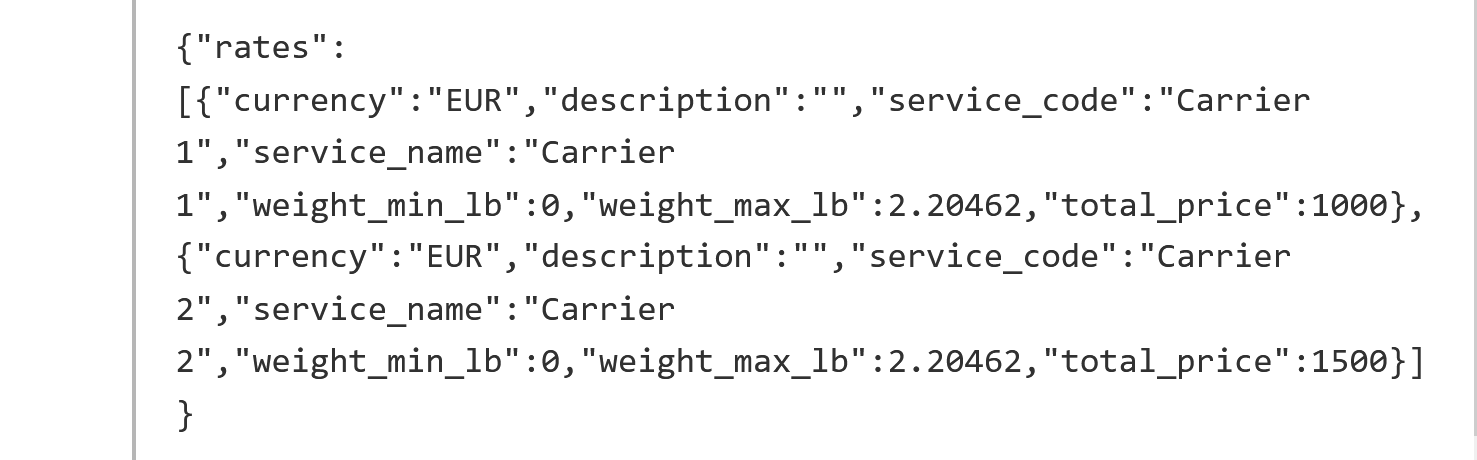
Now under the Cloudflare dashboard we can test the endpoint, and we should see something like this
Installation
Get an access token
To integrate the carrier service, we need to add it using the REST Admin API ( strangely enough, GraphQL doesn’t yet support carrier service mutations).
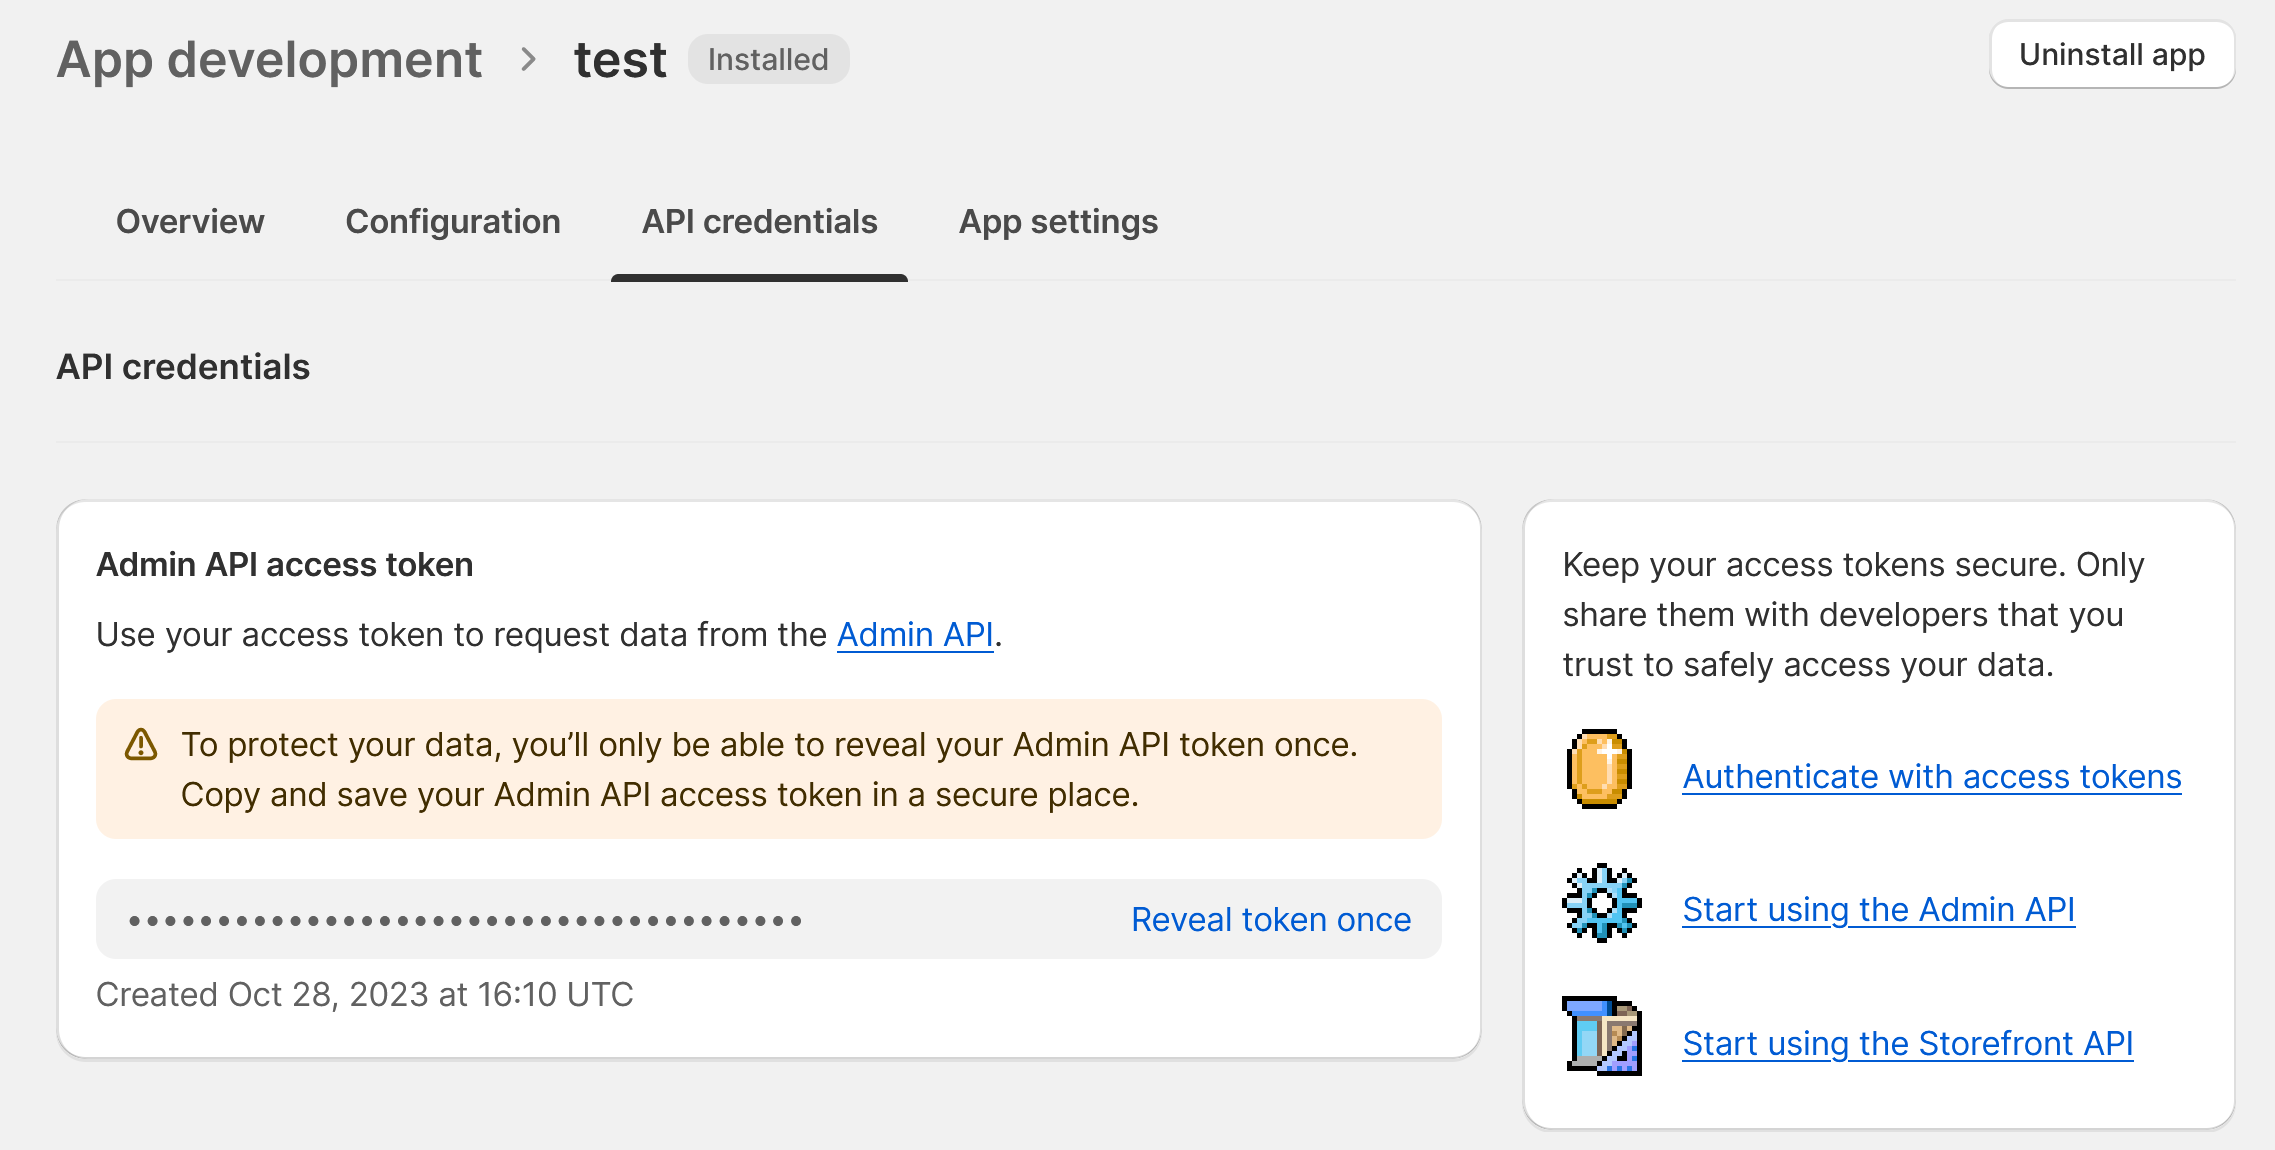
We need an Authentication Token to utilize the REST API. This can be generated from the Shopify dashboard under
Settings -> Apps and Sales Channels -> Develop Apps -> Create An App. Continue to Configure Admin API Scopes
and ensure you select write_shipping. Save and click on Install App. This will provide an access token for us to
execute the REST call.
Adding the Carrier Service
Now we can make the REST call to install the carrier service.
$ curl -d '{"carrier_service":{"name":"My Custom Carrier Service","callback_url":"https://my-carrier-service.filippi.workers.dev/","service_discovery":true}}' \
-X POST "https://your-development-store.myshopify.com/admin/api/2023-10/carrier_services.json" \
-H "X-Shopify-Access-Token: {access_token}" \
-H "Content-Type: application/json"

{"carrier_service":{"id":6.........4,"name":"My Custom Carrier Service","active":true,"service_discovery":true,"carrier_service_type":"api","admin_graphql_api_id":"gid:\/\/shopify\/DeliveryCarrierService\/6.........4","format":"json","callback_url":"https:\/\/my-carrier-service.filippi.workers.dev\/"}}
For name, we input the name to be displayed in the shipping settings. callback_url refers to the URL of our worker,
while service_discovery is set to true to allow Shopify to locate the carrier service. As a response, we receive the
ID of the carrier service, which could be useful for updating or deleting the service.
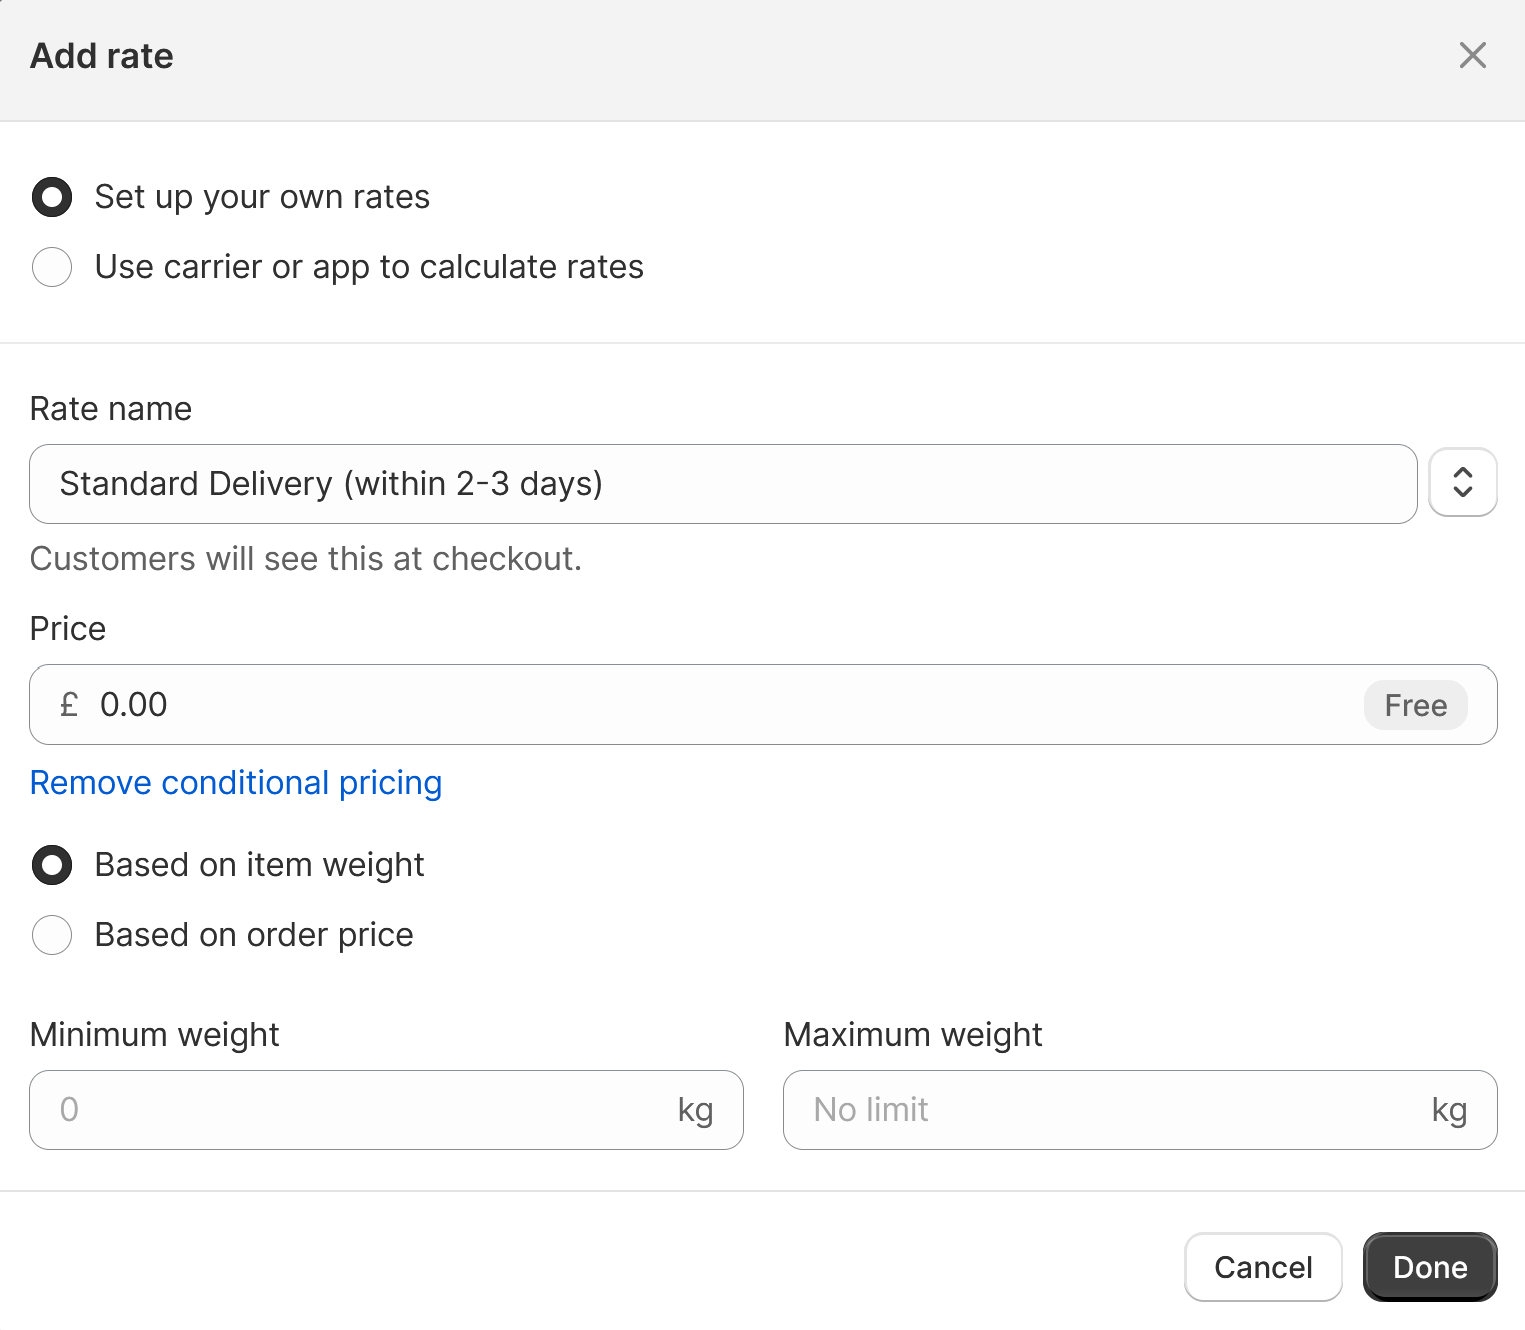
Adding the carrier service to a shipping profile
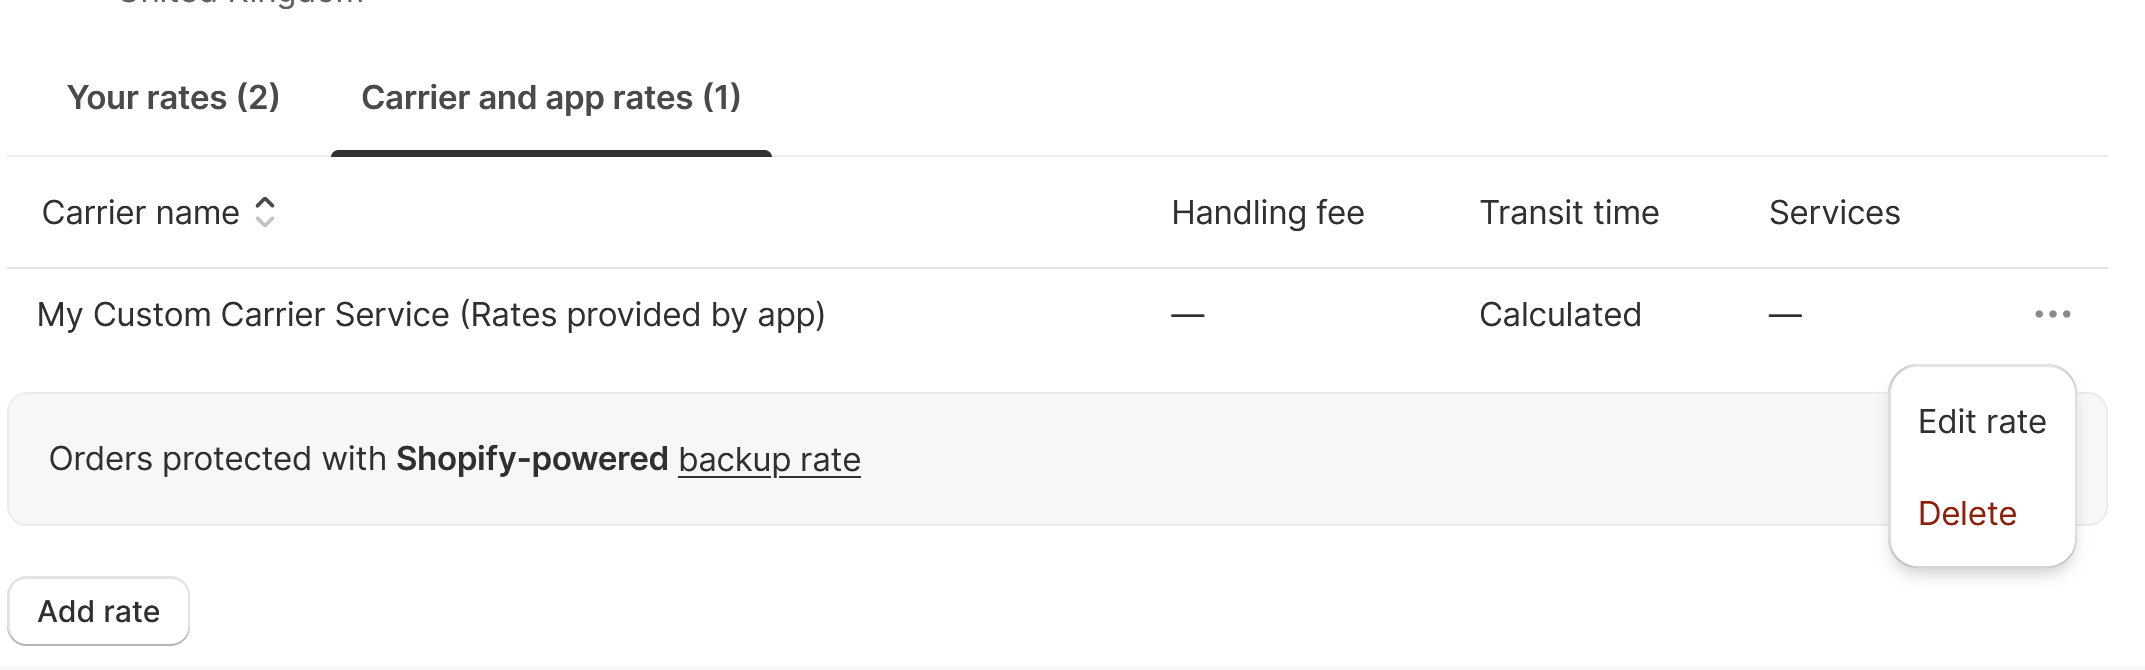
You can now navigate to Settings -> Shipping and delivery and click on your shipping profile. If you already see your carrier service under Carrier and app rates, skip this step. If not, click on Add rate -> Use carrier or app to calculate rates and select your new carrier service.
In either case, you should click on the three dots, then Edit Rate to configure the carrier service. You will need to select all the available services your API provides, if desired.

Testing
We’re finally done, we can check now at checkout that we have the right shipping methods.
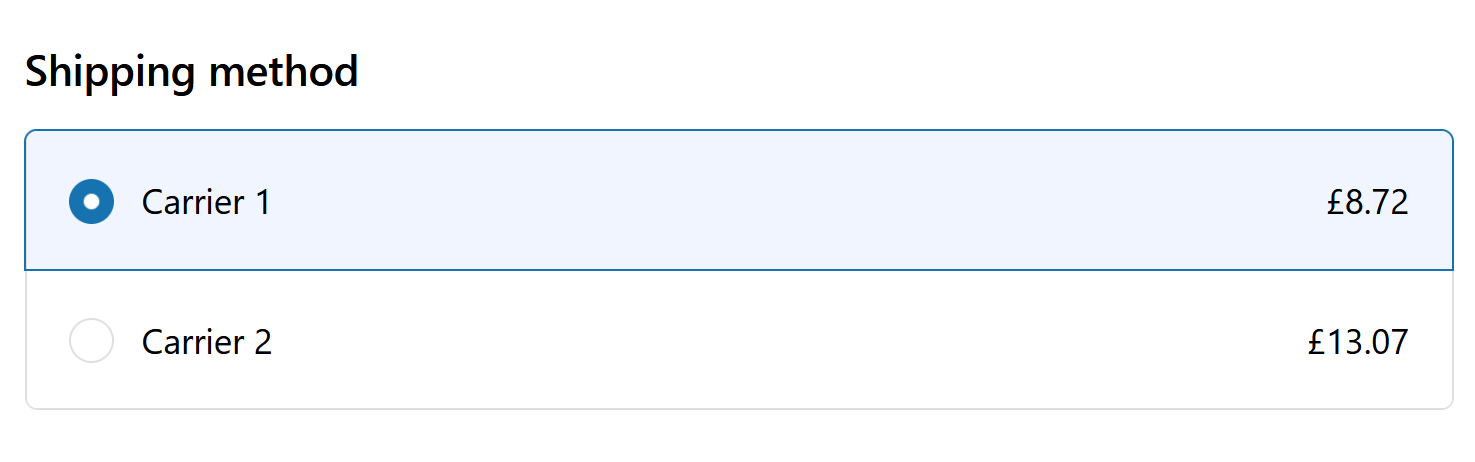
Success! (Prices are in £ because my testing shop is based in UK, Shopify is smart enough to convert the currency)
FAQ on Carrier Service API
- Q: What happens if my API is not responding or generates errors?
A: If no rate is provided, Shopify will use a backup rate based on the weight of the cart. - Q: Why can’t I see a new service I added?
A: You must select the new service (a new service code) in the shipping profile every time you add one. If it still doesn’t appear (which can sometimes happen), try removing the carrier service and re-adding it using the REST call. - Q: Why does the checkout price remain the same despite me changing it?
A: The carrier service response is cached (who knows for how long 😊). Try using a different address. - Q: Why can’t I see the carrier service in the shipping profile?
A: Ensure the REST API provided a successful response and that you have an ID. You can use this API to check all the installed carrier services. - Q: Can I retrieve the configuration from a file?
A: Yes, you can. However, keep in mind that the API is called every time a customer moves to checkout, so you may want to cache the configuration in a KV namespace or, at the very least, ensure that it loads quickly. - Q: Can I use the customer’s email?
A: No, the customer’s email is not provided in the request; it is always null.
Shipping Function
The Carrier Service API is highly useful, but it comes with limitations. For instance, we cannot determine if a customer
is tagged as VIP and therefore cannot offer them free shipping. The only way to achieve this is by utilizing a
function.
Creating the function
To create a function, we’ll utilize the simplified deploy, which can eliminate the need to establish an app.
$ npm init @shopify/app@latest
Welcome. Let’s get started by naming your app project. You can change it later.

?  Your project name?
✔  my-delivery-function

?  Get started building your app:
✔  Start by adding your first extension
$ cd my-delivery-function
$ yarn shopify app generate extension
Before proceeding, your project needs to be associated with an app.
?  Create this project as a new app on Shopify?
✔  Yes, create it as a new app
?  App name:
✔  my-delivery-function
?  Type of extension?
✔  Delivery customization - Function
?  Name your extension:
✔  my-delivery-customization
?  What would you like to work in?
✔  TypeScript
╭─ success ────────────────────────────────────────────────────────────────────────────────────────────────╮
│                                                                                                          │
│  Your extension was created in extensions/my-delivery-customization.                                     │
│                                                                                                          │
╰──────────────────────────────────────────────────────────────────────────────────────────────────────────╯
First Implementation
Input
To implement a function, the initial step is always defining the input, hence we modify the src/run.graphql:
query RunInput {
    cart{
        buyerIdentity {
            email
            customer{
                isVIP: hasAnyTag(tags: ["VIP"])
            }
        }
        deliveryGroups {
            deliveryOptions {
                title
                handle
            }
        }
    }
}
In the request, we will receive the customer’s email and isVIP will be true, if the customer is tagged as VIP.
After modifying the file, we must regenerate the types in TypeScript.
$ cd extensions/my-delivery-customization
$ npm run shopify app function typegen
Functions Limitations. Carrier Service for the help
Can we proceed with implementing the function? Unfortunately, no. The issue is that functions are not capable of adjusting a delivery price. Functions can only: move, hide, or rename a delivery method.
To counter this, we need to modify our carrier service implementation. We will incorporate a new delivery method (for
each service) dubbed {FREE} Service X, and conceal all other methods if the customer isn’t designated as VIP (else,
we will hide the free method).
Updating the carrier service
Let’s proceed with the modifications to the carrier service.
export default {
    async fetch(request: Request, env: Env, ctx: ExecutionContext): Promise<Response> {
        const value: RatesConf = JSON.parse(await env.SHIPPING_CONFIGURATION.get('rates') || 'null') || DEFAULT_RATES;
        let services: Set<string> = new Set();
        let rates: CarrierServiceResponse = {
            'rates': value.rates.map((rate) => {
                services.add(rate.service);
                return {
                    currency: 'EUR',
                    description: '',
                    service_code: rate.service,
                    service_name: rate.service,
                    weight_min_lb: rate.min_weight_kg * 2.20462,
                    weight_max_lb: rate.max_weight_kg * 2.20462,
                    total_price: rate.price * 100
                };
            })
        };
        services.forEach((service) => { // here we add the free delivery
            rates.rates.push({
                currency: 'EUR',
                description: '',
                service_code: service,
                service_name: '{FREE}' + service,
                total_price: 0
            });
        });
        return new Response(JSON.stringify(rates));
    }
};
And after deploying this is the result
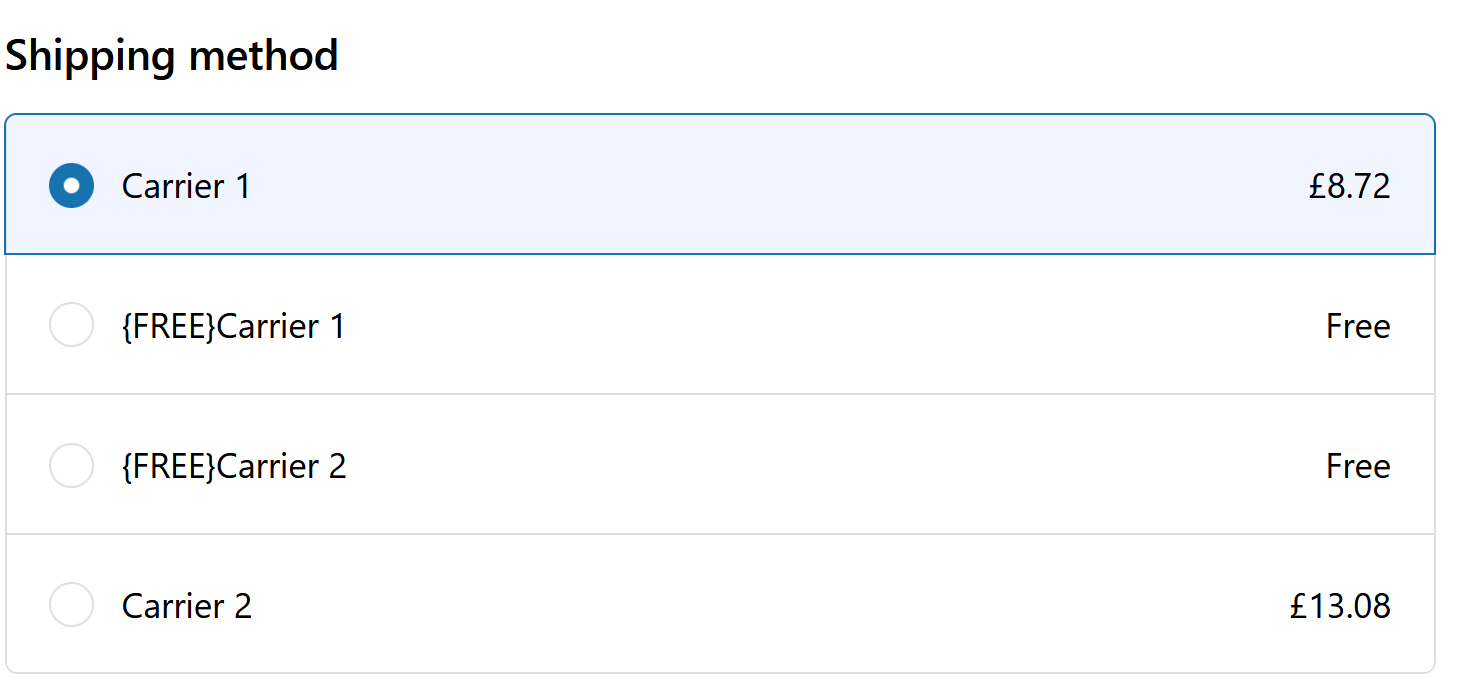
First function implementation
In our implementation process, we will hide all non-free delivery methods if the user is a VIP, and do the contrary for non-VIP users.
export function run(input: RunInput): FunctionRunResult {
    let isVip = input.cart.buyerIdentity.customer.isVIP;
    const output: FunctionResult = {
        operations: []
    }

    function hideDeliveryOption(handle: string) {
        output.operations.push({
            hide: {
                deliveryOptionHandle: handle
            }
        })
    }

    function cleanFreeLabel(option: CartDeliveryOption) {
        output.operations.push({
            rename: {
                title: option.title.replace("{FREE}", ""),
                deliveryOptionHandle: option.handle
            }
        })
    }

    input.cart.deliveryGroups.forEach((group) => {
        group.deliveryOptions.forEach((option: CartDeliveryOption) => {
            if (option.title.includes('{FREE}')) {
                if (isVip) {
                    cleanFreeLabel(option);
                } else {
                    hideDeliveryOption(option.handle);
                }
            } else if (isVip) {
                hideDeliveryOption(option.handle);
            }
        });
    });
    return output;
}
Before deployment, we must update shopify.app.toml with the proper permissions.
scopes = "write_delivery_customizations,read_delivery_customizations"
Now we can deploy the app and the function
$ yarn deploy
?  Release a new version of my-delivery-function?
✔  Yes, release this new version

✔ Created extension my-delivery-customization.

Releasing a new app version as part of my-delivery-function

my-delivery-customization │ Building function my-delivery-customization...
my-delivery-customization │ Building GraphQL types...
my-delivery-customization │ Bundling JS function...
my-delivery-customization │ Running javy...
my-delivery-customization │ Done!
Installing the function
As we have opted not to create an app, we’ll have to install the function manually. We will employ the Shopify GraphiQL App and execute the following query:
mutation deliveryCustomizationCreate($deliveryCustomization: DeliveryCustomizationInput!) {
    deliveryCustomizationCreate(deliveryCustomization: $deliveryCustomization) {
        deliveryCustomization {
            id
        }
        userErrors {
            field
            message
        }
    }
}
With variables
{
  "deliveryCustomization": {
    "enabled": true,
    "functionId": "{your function id found in the partner dashboard}",
    "title": "my-delivery-customisation"
  }
}
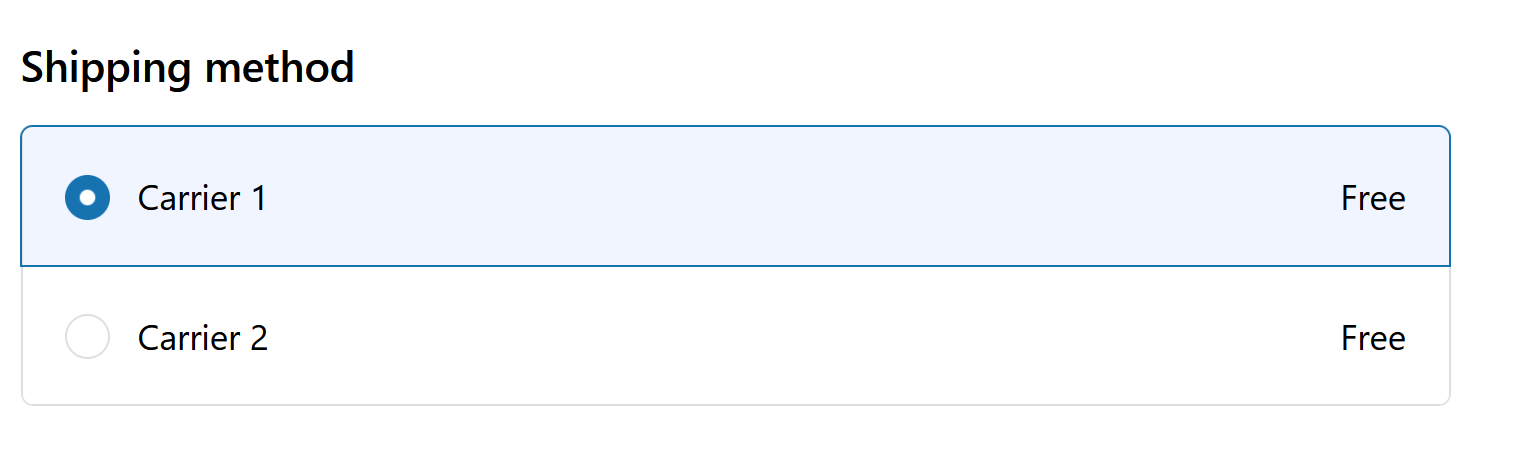
The function is now installed and ready for use. Once we tag a customer as VIP, we will see that
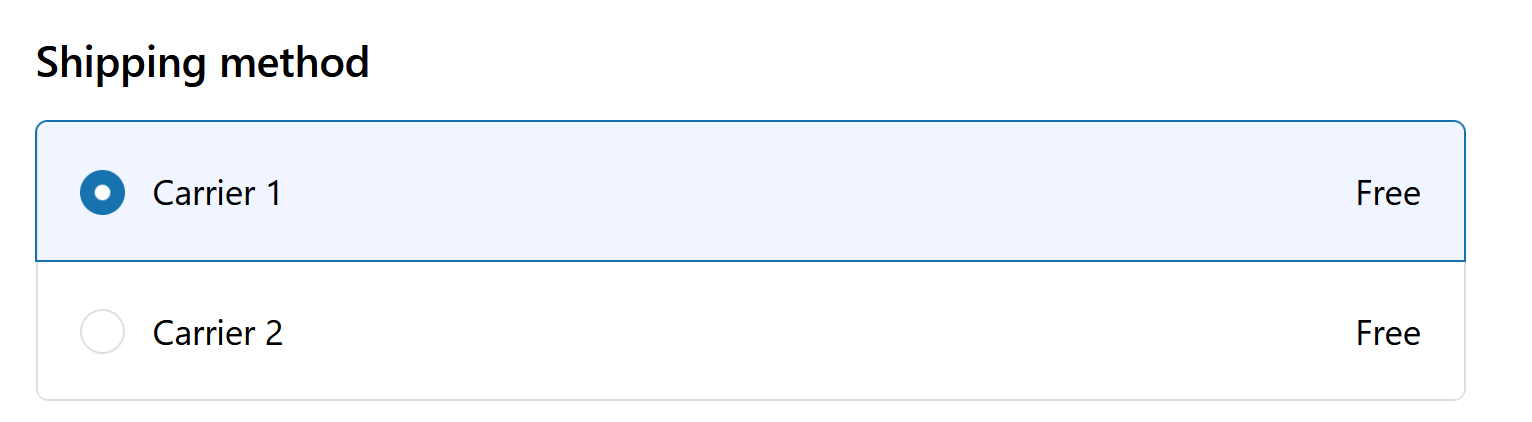
… is working!
Using Configuration
What if the customer decides tomorrow that they want to modify the tag which grants free shipping? We need to move
that VIP tag to the configuration.
The final step will involve using parametrized queries. We want to parametrize the tag, for which we need to utilize Variable Queries.
To use a variable in the query, we need to create a metafield of type JSON that will contain all our variables.
We modify shopify.extension.toml by adding
[extension.input.variables]
namespace = "my-delivery-function"
key = "shipping-config"
We need then to create the metafield, we will use a GraphQL mutation
mutation SetMetafield {
    metafieldsSet(metafields: [
        {
            namespace: "my-delivery-function",
            key: "shipping-config",
            ownerId: "gid://shopify/DeliveryCustomization/1.....0",
            type: "json",
            value: "{\"freeTags\":[\"VIP\"]}"
        }
    ]) {
        metafields {
            id
        }
    }
}
freeTags will be the name of the variable in our GraphQL query.
To retrieve the ownerId you can use this query
{
    deliveryCustomizations(first:10){
        nodes{
            id
        }
    }
}
We can now use the metafield in our input query
query RunInput($freeTags: [String!]) {
    cart{
        buyerIdentity {
            email
            customer{
                isVIP: hasAnyTag(tags: $freeTags)
            }
        }
        deliveryGroups {
            deliveryOptions {
                title
                handle
            }
        }
    }
}
We don’t need any change in the function! we just need to deploy:
$ yarn deploy
Et voilá:
Conclusion
What a journey it’s been! Initially, I thought implementing a free shipping delivery would be easier. However, looking on the bright side, we’ve accomplished a good deal. We now have a carrier service that is easily modifiable, alongside a function that may be leveraged to enhance this service - all just by using configurations.
If you’re interested, the code can be accessed here.
Should you have any questions or comments, feel free to reach out to me on the links below ↓↓↓↓